Digital Manipulation Assignment:
Adobe Photoshop
Basics 101
OBJECTIVE
From your digital roll, choose your best image for each of the following category (line, shape, color- mono, complementary, framing, texture).
Save each finished composition as “Lastname_Firstname_Projecttype.PSD”
Save into your account - post - and you will drop to my google box shortly.
To start
- Open Photoshop
- Go to file – open
- From your digital color roll, choose your best image for each category
- Go to File – Save As
- Change format to Photoshop
- Rename image - Lastname_Firstname_project.psd and as a jpg (2 files)
- Save into project folder under your name
- Then start the below projects…
Using Adobe Photoshop, digitally enhance each image/composition. The requirements are:
- Each image must be manipulated somehow.
- Each of the following manipulation techniques must be used at least once during the manipulation of the images:
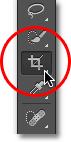
- Cropping – Qty 3
- – use the Cropping tool to alter the original composition
- Select the CROP TOOL
- Use the tool to select the part of the image you want to crop (keep)
- Double click in the area or hit ENTER
- Brightness/Contrast TWO TYPES - Qty 4 -
The first Type is the one that will permanently changes the image!
- – use the Brightness/Contrast dialogue box to enhance your photography
- TYPE 1 QTY 2
- Click IMAGE >ADJUSTMENTS >BRIGHTNESS/CONTRAST

- Adjust the brightness and contrast as you see fit
- Click and unclick “Preview” to view the changes
- Click OK
Type 2 - QTY 2
The second Type is the one that will create a layer and will not change the image!
The Adjustment Layer - creates layers...
Another way is by clicking on the Brightness/Contrast icon in Photoshop's Adjustments panel. It's the first icon on the left, top row


- SELECTION TOOLS - You will learn how to use the selection tools - then I want you to add a filter those areas to show you can use the selection tools correctly.
- QTY 6

- If you look in the Options Bar along the top of the screen, you'll see a series of three icons which let us switch between the tool's three selection modes (from left to right - New selection, Add to selection and Subtract from selection). The "Add to selection" option (middle one) is already chosen for us, since the whole point of the Quick Selection Tool is to continue adding to the selection until you've selected everything you need:

Quick Selection Tool QTY 1 -


Magic Wand Selection Tool x 2
- Use the Magic Wand Tool to make selections based on colored pixels in contact with each other.
b. Adjust the Tolerance level to make the Magic Wand more specific or more general.
c. Hold SHIFT to add to the selection, and ALT to subtract from the selection.
d. To INVERSE your selection,
click SELECT >INVERSE or SHIFT+CONTROL+I. To deselect, click SELECT >deselect or CONTROL+D.
The Tolerance option tells Photoshop how different in tone and color a pixel can be from the area we clicked on for it to be included in the selection. By default, the Tolerance value is set to 32, which means that Photoshop will select any pixels that are the same color as the area we clicked on, plus any pixels that are up to 32 shades darker or 32 shades brighter.

Marquee Tools x 2
- Click and hold on the various marquee tools to get different methods of shape selection
- Click and hold on the Lasso tool to select different types of selection tools in that category.
- Click and drag around areas you want selected. Hold SHIFT to add to a selection and ALT to subtract from a selection.


4. Desaturation – Qty 2
- Change an image from Color to Black & White
- Click IMAGE >ADJUSTMENTS >DESATURATE
- Or click SHIFT +CONTROL+U

Filter - um - get this out of your system - because we will not be using them again!
- Apply a Filter – QTY 6 different
- Create five different files. Using five different filters in each
- – change the look of an image using the filter options
- Click FILTER >filter type > choose your filter
- Each filter has its own effects and settings

- Manipulate a section of the photograph –qty 1
- using the various selection tools, select specific parts on the image to manipulate (color, contrast, saturation, filter, etc.) as you see fit.
No comments:
Post a Comment